Showing posts with label Crackle Polish. Show all posts

Thursday, February 24, 2011

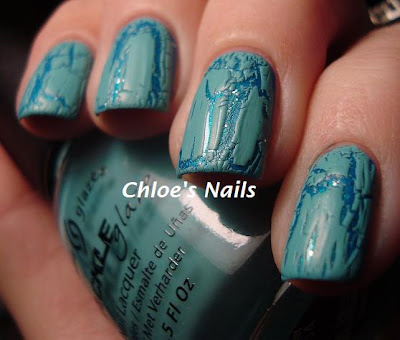
My New Barry M's with...yep more Crackle!!

So I received some Barry M polishes in my swap, and I have never used this brand before so I was so excited! I wish these were available in the US, but thanks to a new friend, Suzanne, I have my first 3! The third is the Barry M crackle, and I will be playing with that later on in the week. For this I started with Barry M, Cyan Blue. The formula on this was perfect!


Then I added Barry M, Silver Sea. I love this, it is very sheer, but has such pretty silver glitter bits in it!!


then because I just wanted to play, I added China Glaze Crushed Candy over top, but I didn't add a coat of SV.


Okay I promise to give you all a Crackle break after this, lol. I received my 2nd swap package and it contained some more amazing pretties that I can't wait to share with you all!!

Wednesday, February 23, 2011

More Crackle fun!

The other night I played a little more with my crackles. Man, I just love this stuff, lol. I also want to apologize for my late responses to comments and emails. I have just been so crazy with work lately. I am getting to them though. At least I have post for you guys, right? lol.  Okay back to the fun. For this I started with L.A. Girls Hot Pink Matte.


Then I used Cracked Concrete again over top.


with a coat of SV on top


Then for fun I added China Glaze Crackle Lighting Bolt over top. 


now with SV on top

Tuesday, February 22, 2011

Crackle Craze

So crackle polishes are everywhere now, and I'm thrilled. I know some of you just don't like the effect, and if you don't, you can skip this post and maybe tomorrows, lol. I just love the look. You also know how much I love my Funky Finger polishes, especially their glitters. Since I had finally received my China Glaze Crackles, I had to play, and like I mentioned, tomorrows post might be a few other manis I did with them. For this mani, I used China Glaze Cracked Concrete and Funky Fingers Blitzen, from the 2010 Holiday collection.

I started with 2 coats of Blitzen


Then added Cracked Concrete. This is pre SV


Now with SV

I actually kind of prefer it prior to my top coat. I think the effect and look is really cool!

Friday, January 28, 2011

OPI Black Shatter has arrived!!

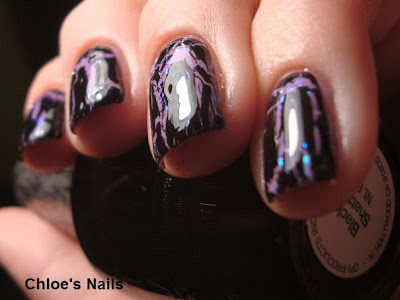
YAY, Black Shatter is finally here!! I was soooo excited when it arrived!! I wanted to try 2 different manis, so I decided to layer it over a sparkly gold & then a flakie.

Here is the first one I tried....I did a base of Orly Luxe and then a coat of China Glaze Medallion, which FYI is my fave sparkly gold glitter! Black Shatter needs to be used over a 100% dry mani, and used VERY quickly. I actually prefer the smaller cracked looked, like in my previous post, but this is still nice.


Then I wanted to try it over a flakie, so I used a base of Love & Beauty, from Forever 21, and then added Nfu-Oh 50 over top.

1 word.......BEAUTIFUL!!


Now here it is with Black Shatter over top


Thursday, January 27, 2011

Kelier Black Crack Polish from Born Pretty

So Jessica from http://bornprettystore.com/, which btw, has some other amazing nail art items, sent me the Kelier Black Crackle Polish for me to review.
I will say that I had to play with it for a few minutes, to discover the best way to use this Crack polish, and here is what I learned. In order to get the effect I preferred, I needed my base coat to dry 100%. When it was, I applied a pretty thick coat of the Black Crack polish, and waited. Now unlike others I've tried, this one did take a smidge longer for the cracks to appear, but once they did, i loved it! Then I also learned that if you plan on using a top coat, WAIT. The Crack polish needs to be 100% dried. If it is not, when you apply it, it sort of fills in the cracks, and just looks like a plain old black polish.

Here was my final mani....Now I know this look isn't for everyone, but I'm a fan :P


The pic below is where I was playing in the beginning. My ring finger, 3rd finger, was the one that I let my base dry completely, and applied a thick coat of Crack polish over top, and also waited for the Crack Polish to dry 100%.

My pointer, middle & pinky, I also applied dry, but applied a VERY thin coat of Crack polish. This caused TONS of itty bitty cracks, which did look cool, but I preferred the fewer tad bigger cracks. Then you can kind of see how when I applied my top coat while the Crack polish was still semi wet, that some of the cracks vanished, and filled in. It was weird.


If you are interested in ordering from Born Pretty, use my code, CHLOEK31, and get 10% off from now till March 31st, 2011,